How to Use e-Invoice
Requirements
Before start generate new e-Invoice, you must complete your onboarding process. Learn more about how to register to DOKU as a merchant here.
Generate e-Invoice
- Login to the DOKU Back Office
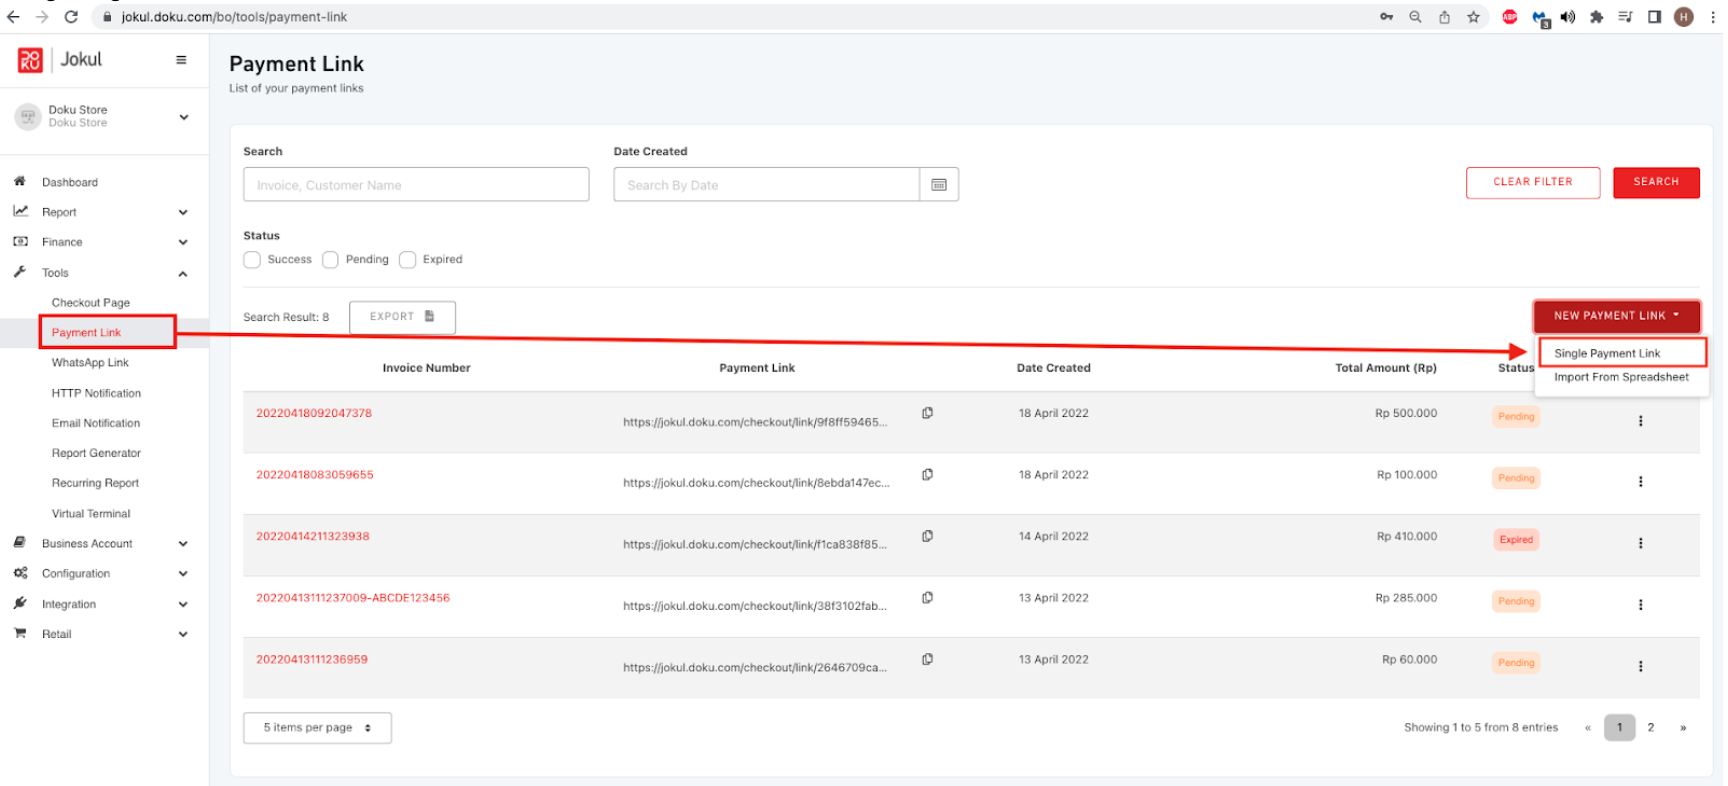
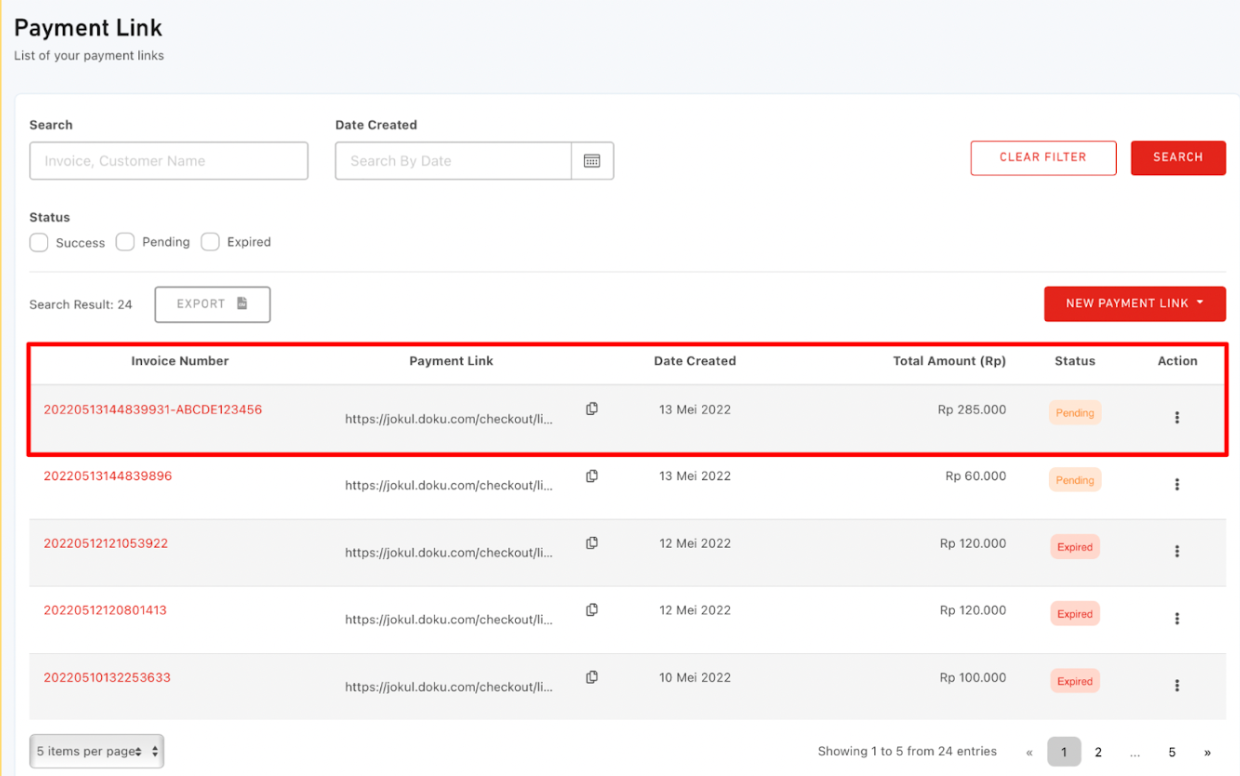
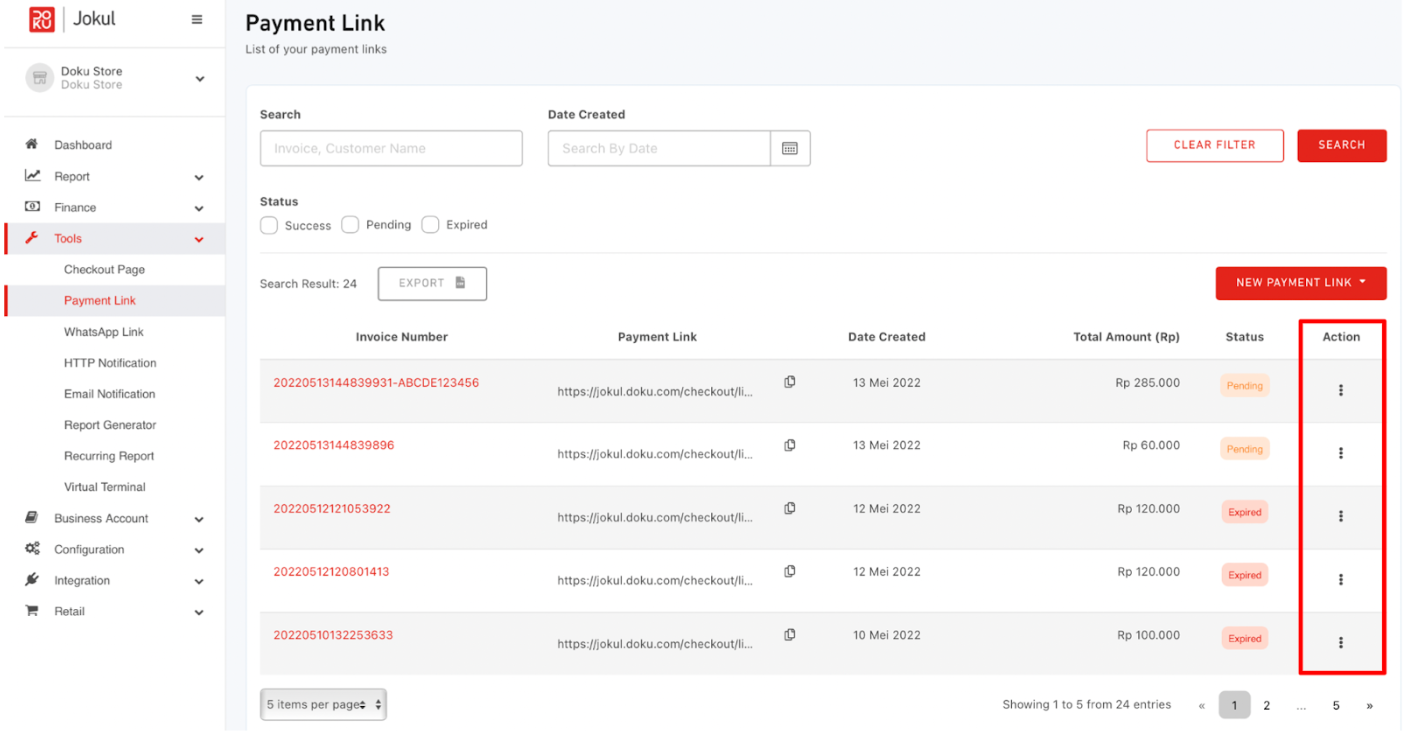
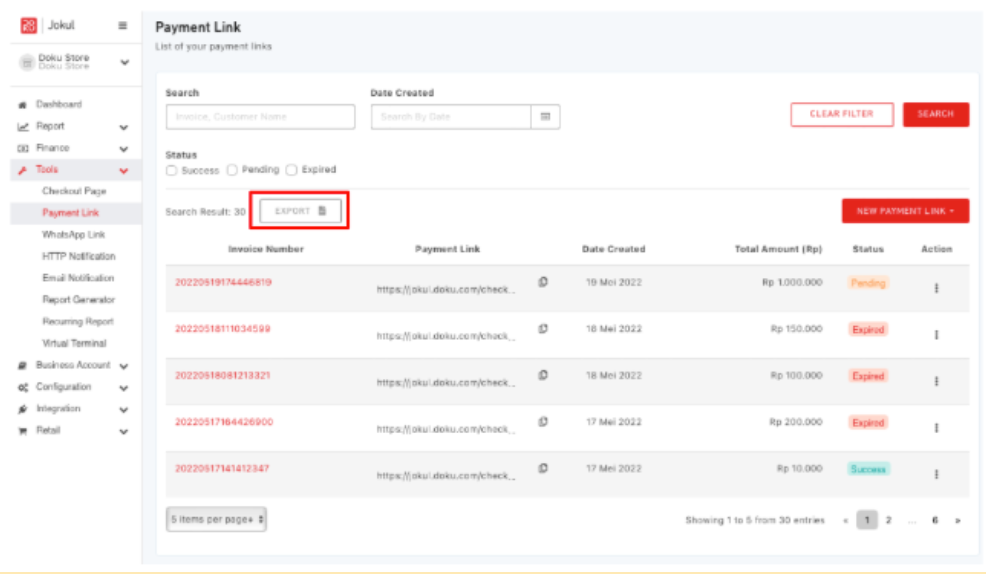
- Go to Tools > Payment Link, the interface will appear like in the picture below
- Click New Payment Link button, this will show the dropdown menu
- Click Single Payment Link
- Then a form will appear to generate a e-Invoice. The explanation on table below :
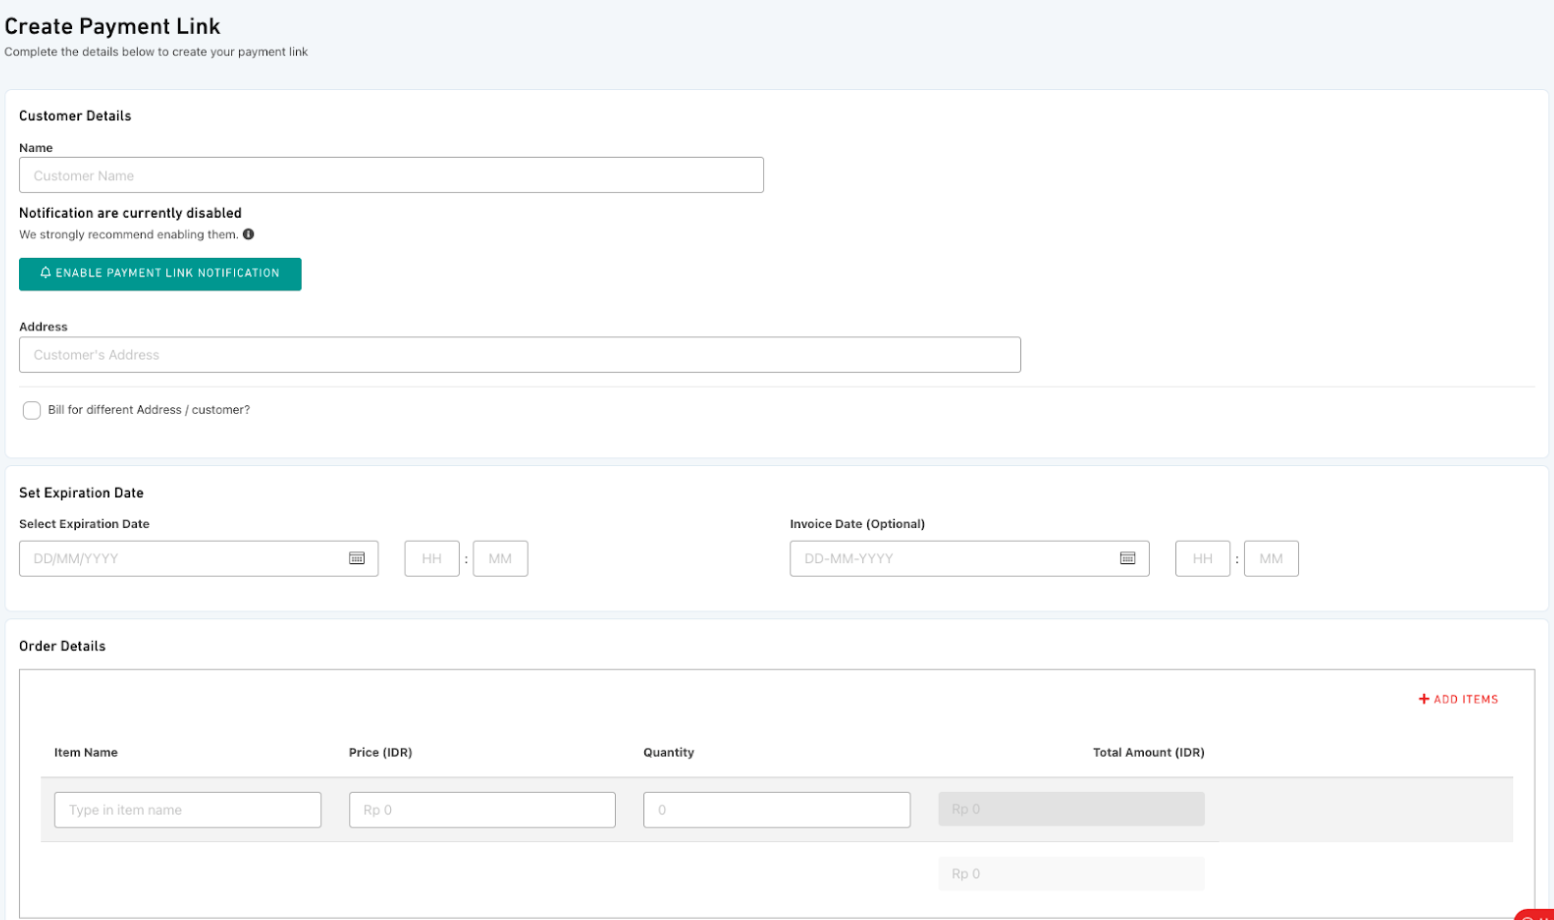
List of e-Invoice Form
| Form | Mandatory | Explanation |
|---|---|---|
| Name | ✅ | Name of merchant's customer ( Allowed spesial chars: (dash) - , (underscore) _, (dot) . |
| ✅ | Merchant’s customer email, configured by merchant. Learn more | |
| Address | ❌ (Optional) | Merchant's customer address. |
| Bill for different Addres's/customer | ❌ (Optional) | Check if merchant's customer have different billing address. |
| Select Expiration Date | ✅ | Link expired date. a. Should be greater than current date and time. b. Suggest setting the expiration date maximum is 1 year from current state. |
| Insert Expiration Time | ✅ | Link expired time. a. Should be greater than current time. b. Suggest setting the expiration time maximum is 1 year from current state. |
| Select Invoice Date | ❌ (Optional) | Invoice issued date. a. Should be greater than current date and time. b. Suggest setting the expiration date maximum is 1 year from current state. |
| Select Invoice Time | ❌ (Optional) | Invoice issued time. a. Should be greater than current time. b. Suggest setting the expiration time maximum is 1 year from current state. |
| Item Name | ✅ | List of the item name of the merchant customer's invoice |
| Price | ✅ | Price per item. |
| Quantity | ✅ | Quantity per item |
| Total Amount | ✅ | Grand total of price and quantity for each item. |
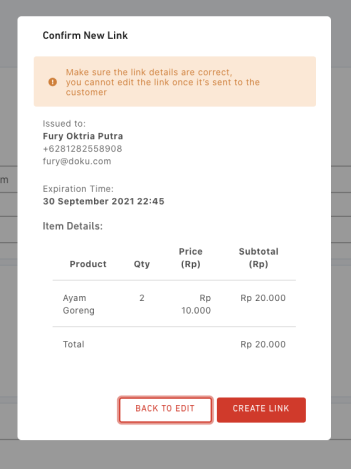
- Then will appear a pop-up named confirm new link that contains all of the data that was already submitted by the merchant before the e-Invoice is created. When a merchant is confirmed to generate a payment link click create link, otherwise, click back to edit.
- Then, the link will be generated and appear on the top of the e-Invoice List
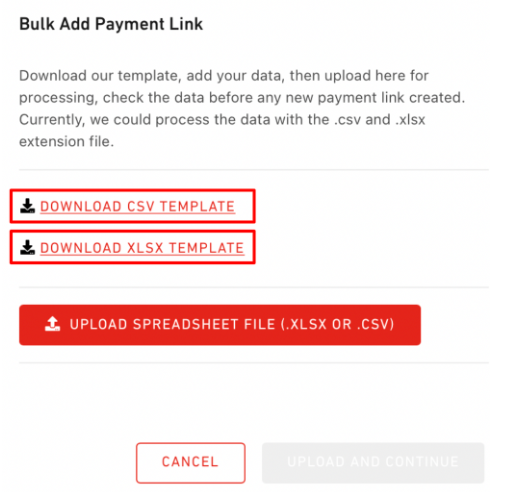
Generate Multiple e-Invoice
- Login to the DOKU Back Office
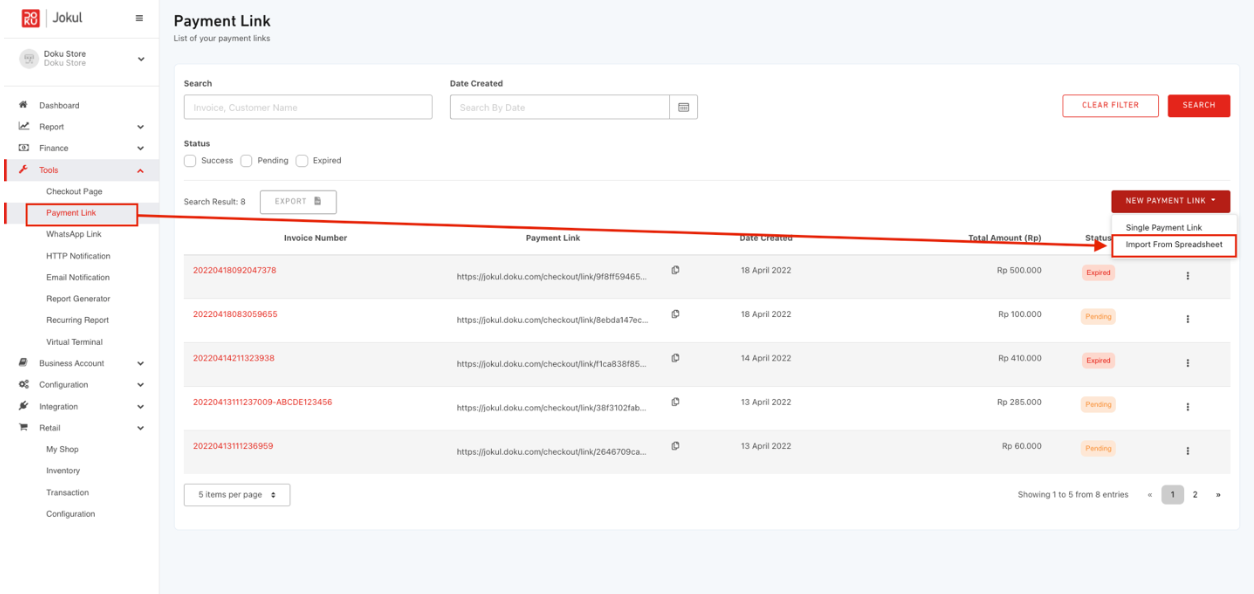
- Go to Tools > e-Invoice, the interface will appear like in the picture below.
- Click New e-Invoicebutton, this will show the dropdown menu.
- Click Import from spreadsheet
- A pop-up will appear for merchant to upload the spreadsheet file
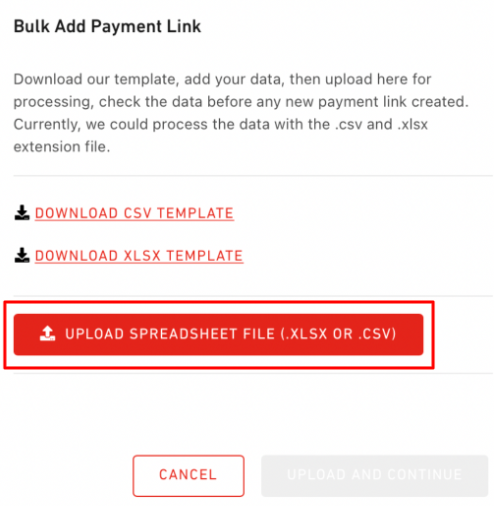
- Before uploading, make sure your spreadsheet file matches the provided template. Merchant can choose to download the spreadsheet templates by clicking each type of format (XLS, CSV, XLSX)
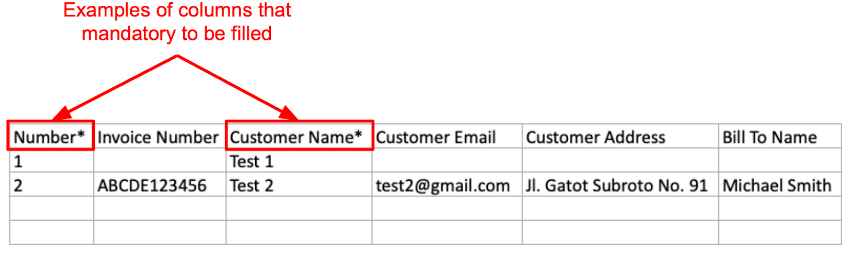
- Merchants can enter a list of e-Invoice that they want to generate into the spreadsheet. According to the picture below (item with (*) determine to be mandatory field)
- If merchant have something to ask or failed to upload, please call 1500963 or report in here
Export Transaction
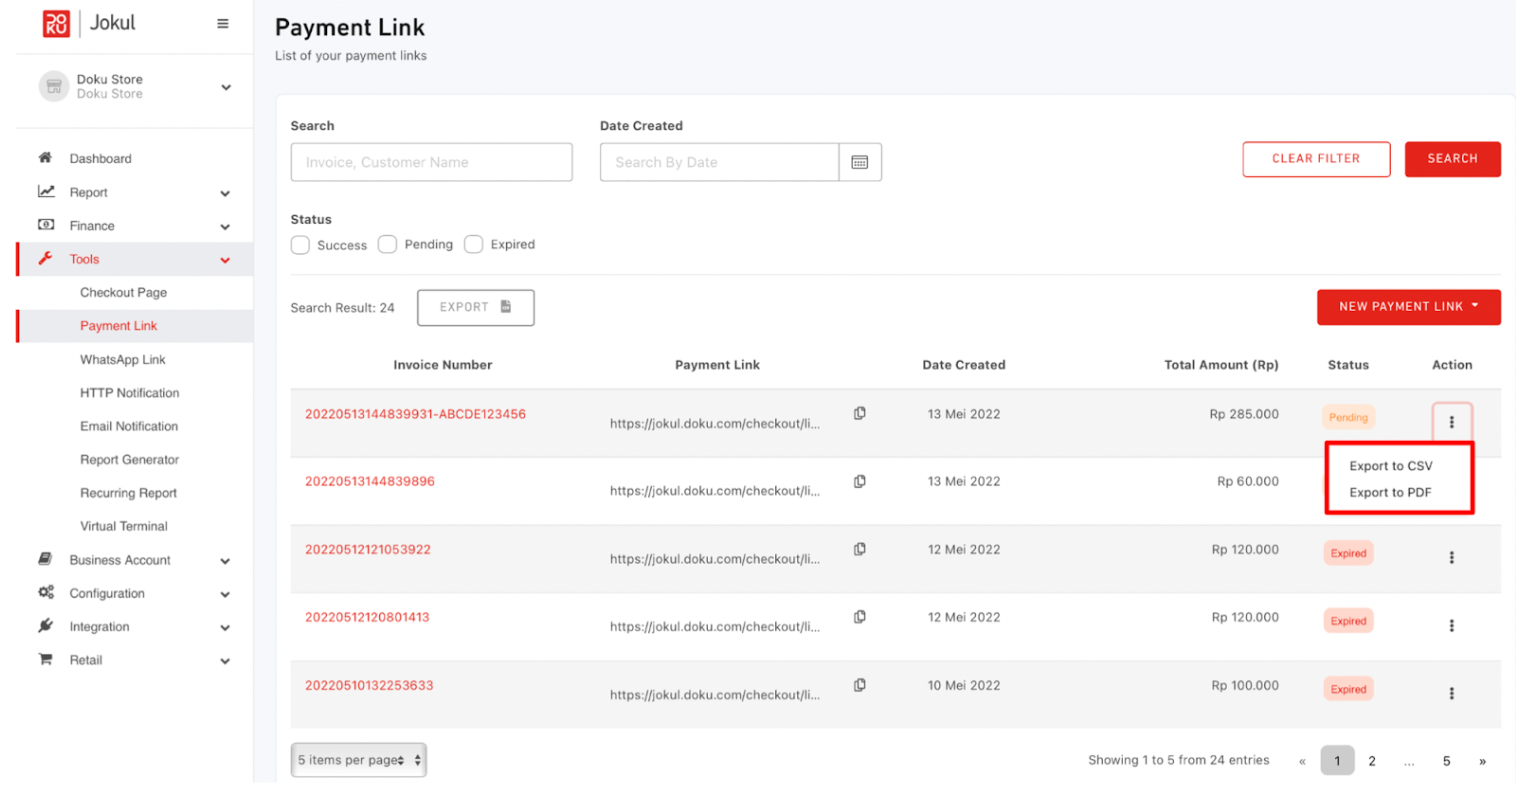
- After merchants generate a e-Invoice, in the e-Invoice List table on the Action column there are three vertical dots icon. The functionality of the icon is to export transaction in CSV or PDF format.
- Then, try to click the icon and it will show the dropdown menu. Choose by needed whether in CSV or PDF format
- If merchant want to export transaction in large quantities, merchant can use export button. Merchant can export all transaction or sort transaction based on order status.
- After that, will be displayed pop up like the picture below. Merchants can export file in CSV or PDF format and click “Export File”

Detail Transaction
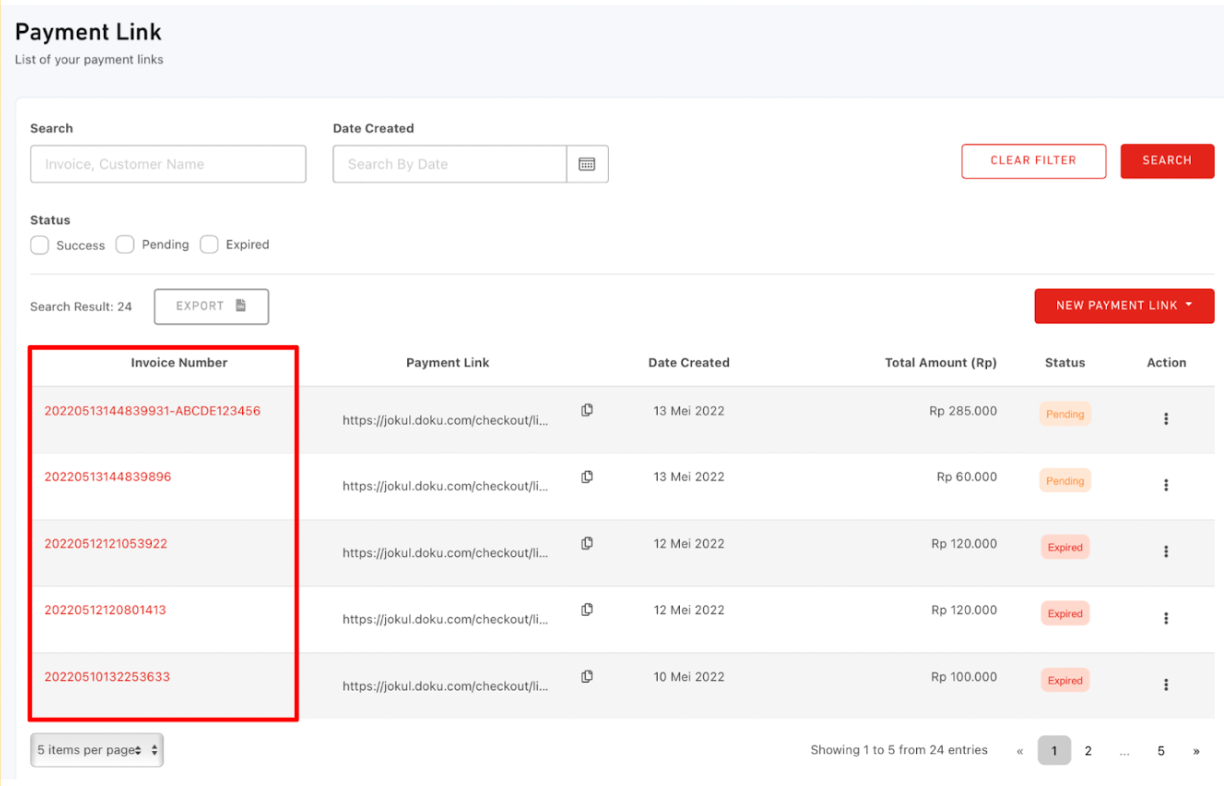
- When a merchant wants to understand details for each transaction for each e-Invoice, the first step is to click the invoice number of the transaction that merchant wanted, the list showing the picture below.
- After clicking the invoice will appear a detail of the transaction like the picture below.
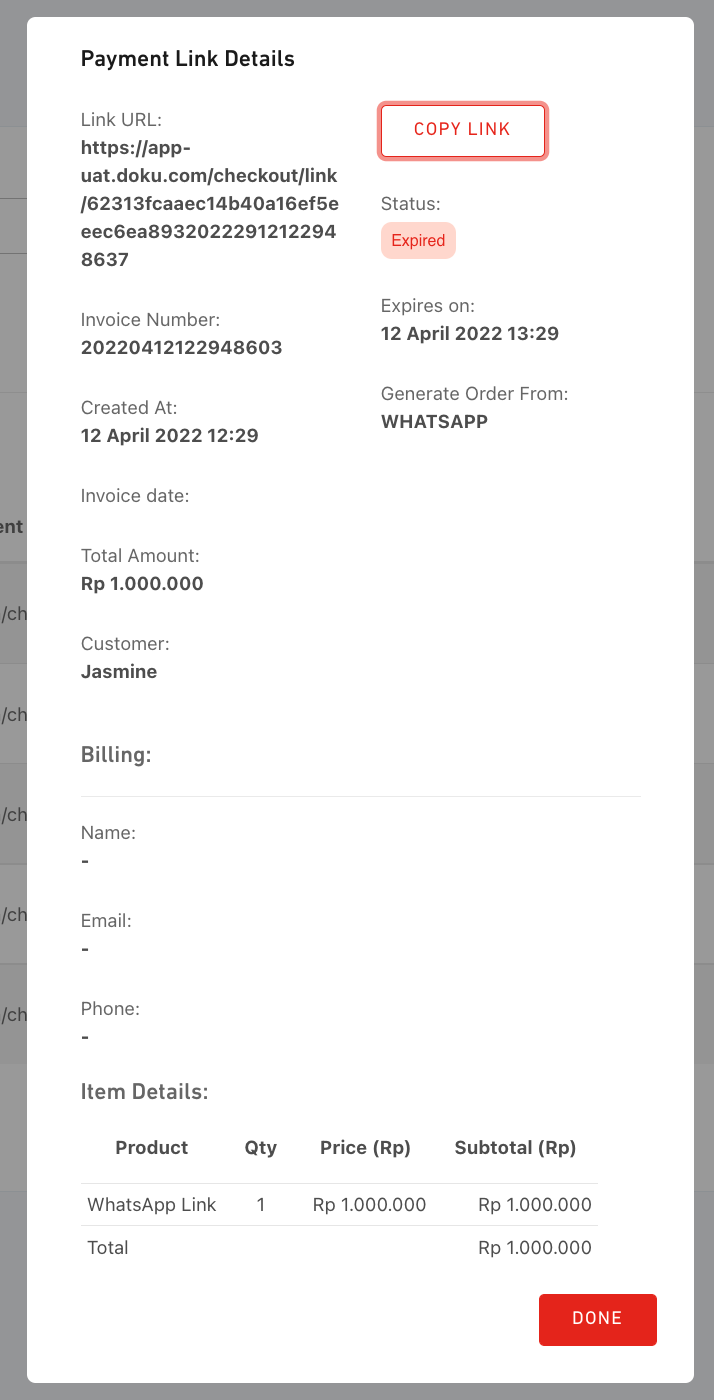
For the explanation of the e-Invoice Details shown in the table below.
List of e-Invoice Details
| Data | Explanation |
|---|---|
| Link URL | e-Invoice that merchant is generated |
| Invoice Number | Invoice number that generated from DOKU System |
| Created Date | Time when e-Invoice is generated, using GMT + 7 Time Zone (Jakarta, Bangkok, Ho Chi Minh). |
| Invoice Date | The time when the invoice was published |
| Total Amount | Amount that merchant determine for their customer |
| Customer | List of Customer Data include a. Customer Name b. Customer Phone Number (optional) c. Customer Email. (optional) |
| Status | Merchant’s payment status, explained by: a. PENDING: Merchant’s Customer still does not process the payment (under expiry time). b. EXPIRED: Merchant’s Customer does not process the payment (more than expiry time).c. SUCCESS : Merchant’s Customer is process the payment and already well-received based on the notification that we get from our system. Those status is changed automatically by our system |
| Expires On | The deadline of the e-Invoice before expired (can’t be used by the merchant). |
| Generated Order From | We provide two schemes: a. DOKU : Through DOKU Dashboard b. WhatsApp: Through WhatsApp Link |